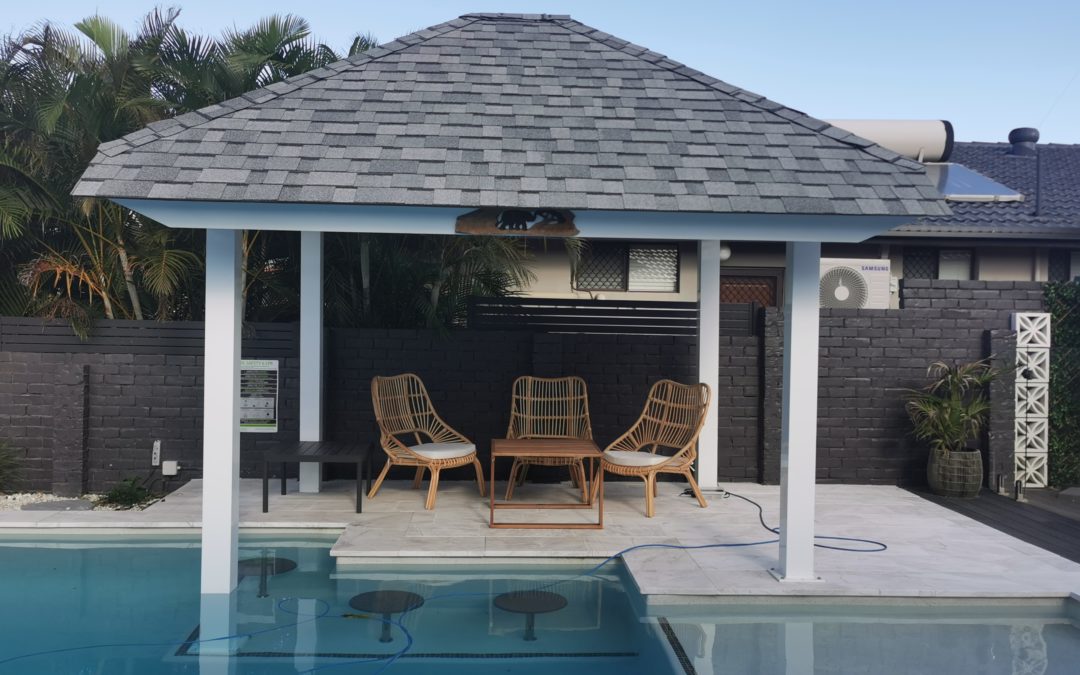
When it comes to functionality and beauty, the asphalt shingle tops the list of preferred roofing systems. It is not only visually appealing but also resistant to environmental damage. Yet, its advantages are useless if the proper installation procedure is not followed. That is why it pays to know the appropriate steps for asphalt shingles installation to save time and money and enjoy all its advantages.
What to do?
Here are the basic steps of asphalt shingles installation:
STEP #1: Preparation
Planning and preparation are essential in any installation process. And for the installation of asphalt shingles, here are the things to consider when planning:
Examine the Roof
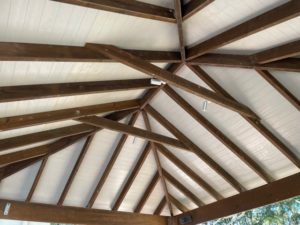
To ensure the right outcome when refurbishing your Bali Hut or Gazebo. Start with the removal of the existing roofing material i.e thatching or wood shingles etc. Followed by de-nailing the rafters. Then examine that the structure is sound and that there is no dry rot in the rafters.
Determine the Appropriate Number of Shingles to Use
Know how many shingles are required for the entire hut or gazebo. That is because you do not want to waste money by purchasing too many of them.
Typically, three bundles of shingles will cover 9 square meters. However, to obtain a precise figure, use shingle roofing calculators or seek professional guidance.
STEP #2: Installation
After ensuring that everything is in order, we can now begin the installation process.
Give Emphasis to the Roof’s Layered structure.
There are vital components beneath the asphalt shingle roof that are not visible. Yet, even if they are hidden, they play an essential role in creating a layer of protection.
Seek Professional Assistance
You might have seen DIY roof installation videos. While helpful, the East Coast Bali Huts and Gazebos team believes that you should put your trust in the professionals when it comes to installing asphalt shingles.
Hiring professionals ensures cost-effective, high-quality work, prompt service, and a product warranty. Thus, let the asphalt shingles installation professionals handle the rest after preparing your roof.
And if you are curious about how they do it?
- Roofers will begin installing the first layer by installing a marine-grade ply over the rafters. For a long-lasting roof, it is essential to use a marine grade ply and not a general use ply. Followed by a sarking to ensure waterproof protection. After which the powder coated aluminum drip edge will be installed.
- After the drip edge and underlay have been installed, the next step is to attach flashing to areas that are attached against something, such as a chimney, walls, or other penetrations.
- Once finished, they will begin laying the starter shingle. Expert contractors install various asphalt shingle types.
- Following this, the final set of ridge shingles is installed to cover the ridge and hips of your roof.
STEP 3: Follow-up Care
Before releasing your contractors, conduct a final inspection to ensure that your asphalt shingle roof is installed correctly. After you have double-checked that everything is in place, finish the process with the final cleanup.
Are you ready to give your gazebo a facelift with asphalt shingle installation?
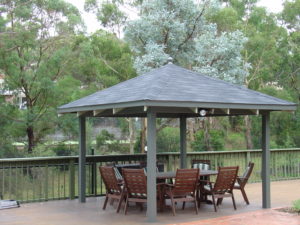
After you have figured out how the roofing installation process works, it’s time to look for a reputable roofing company. East Coast Bali Huts and Gazebos are one of the most dependable teams to transform your backyard into something spectacular.
It is our mission to create outdoor spaces you have always imagined, and we make sure that you enjoy the advantages that come with installing asphalt shingle roofs.
If you want to work on your dream outdoor space with us, give us a call on 1300 575 550 or send us an email at office@eastcoastbalihuts.com.au.